Batch upload wizard allows you to upload multiple records simultaneously from a specially formatted Excel file, CSV file or an SDF. This page describes the wizard steps. For file format and keyword details refer to batch upload file format section.
Step 1 - File selection

You can reach first step of the batch upload wizard by selecting "Database > Batch data upload" menu item. At this step you can select the file to upload.
The Allow molecule lookup by name on PubChem checkbox is relevant for cases, when molecules in the uploaded file are identified by names rather than by structure (SDF or SMILES). When this checkbox is selected, the OCHEM batch upload wizard will attempt to find molecule structures by the provided name in the PubChem database. The process can be rather slow and unsuitable for large amount of molecules.
When the Allow article lookup by PMID on PubMed checkbox is checked, the articles provided by PubMed PMID rather then OCHEM AID will be retrieved from PubMed automatically.
When the Make the uploaded records hidden checkbox is checked, all the uploaded data is marked as hidden (private). Note, that you can make your data hidden by defining a "HIDDEN" column in the uploaded data file (see file format section for details).
Once you have selected the data file you would like to upload, you can proceed to Step 2 by pressing the "Upload" button. If the file is corrupt or of the unrecognized format, you will be redirected back to the current step with the error message.
Step 2 - Column remapping
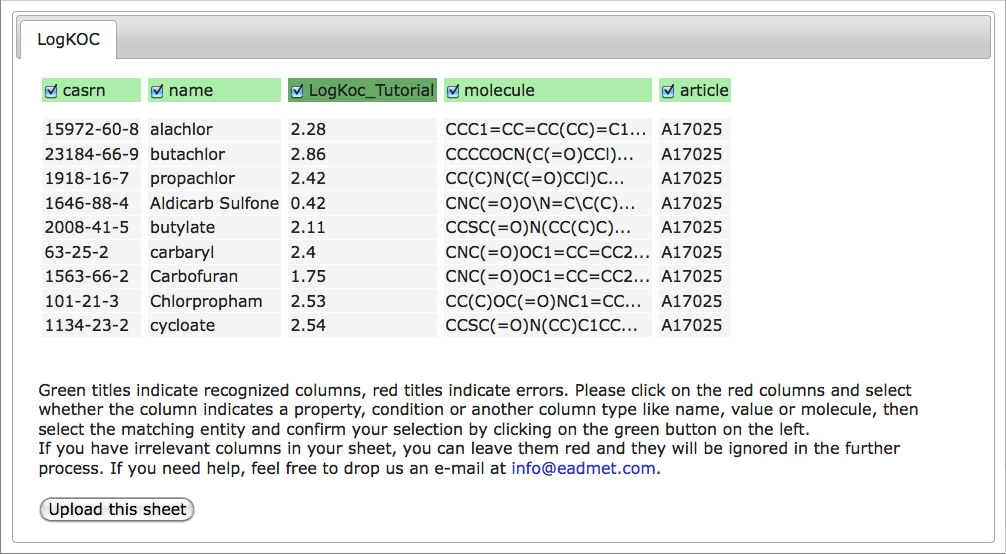
At step 2 you have the possibility to preview the uploaded file. At this point the file contents is not processed and only the column headers are analyzed. The columns that were correctly recognized will be highlighted in green. The dark-green columns will hold the recognized property or condition names, the light-green columns hold the recognized column names. At this step you can select or unselect the columns for upload. By clicking on the column headers you can remap the unrecognized columns to an appropriate valid column name or property/condition name.
Step 3 - Value remapping
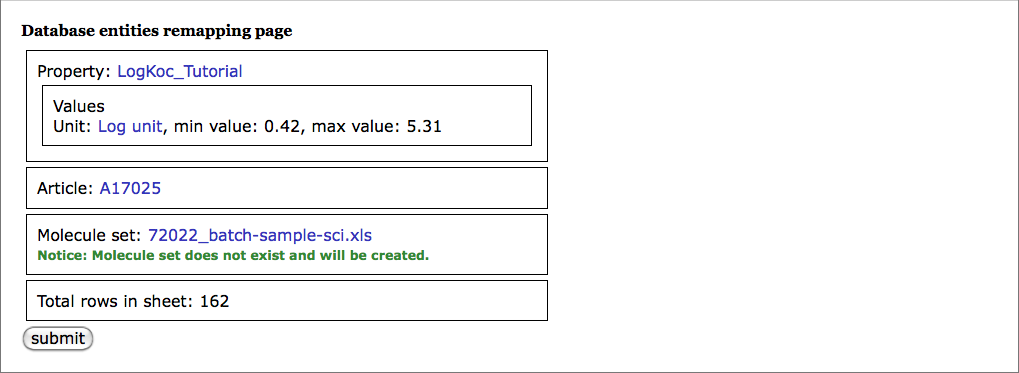
At step 3 you have a basic preview of the data file contents. You can see a list of properties, conditions, units, articles and baskets referenced in the file. If the units, for example, are not explicitly specified in the file, the default unit for the property will be shown. At this step you can also remap the unit, if the default value does not fit the uploaded data. You can also select an existing basket to fill with newly uploaded records.
Step 4 - Batch upload preview browser
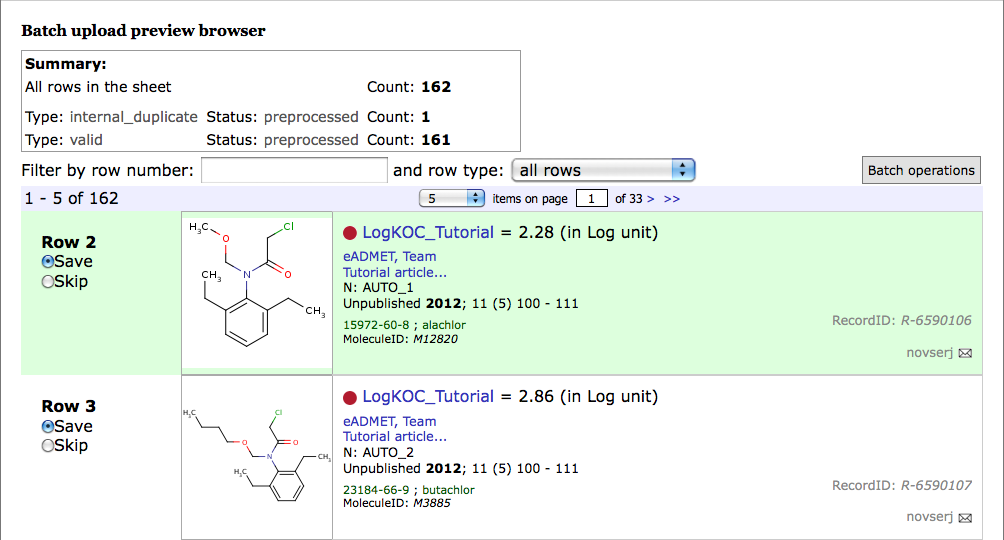
At step 4 you can have a real preview of the uploaded data. No data has been uploaded to the database yet. The summary at the top of the screen shows the number of valid records contained in the uploaded file, the number of internal duplicates (i.e. duplicated within the file), the number of external duplicates (i.e. duplicates of records already existing in the database), erroneous records, etc. You can individually or through Batch operations button select or unselect records from further upload.
Once you are satisfied with the data that will be uploaded, click the Proceed with upload button. After this point the data will be introduced to the database. You will see the progress meter with time estimates.

Step 5 - Finish
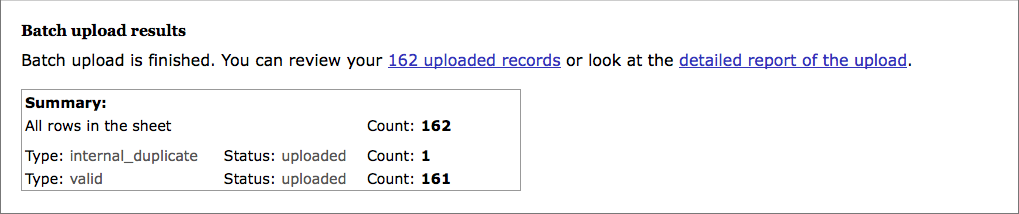
Once the data has been uploaded, the resulting report will be presented. You have the option to either download the report of the upload process in Excel format, or to directly jump to the uploaded records in the Experimental property browser.